Hello World application
This tutorial is a presentation of the code of your first “HelloWorld” application. You’ll get a glimpse of your code and you will run your first application.
This guide is meant to be used with the evaluation version of CrossMobile.
If you haven’t installed CrossMobile yet first look at our first run tutorial.
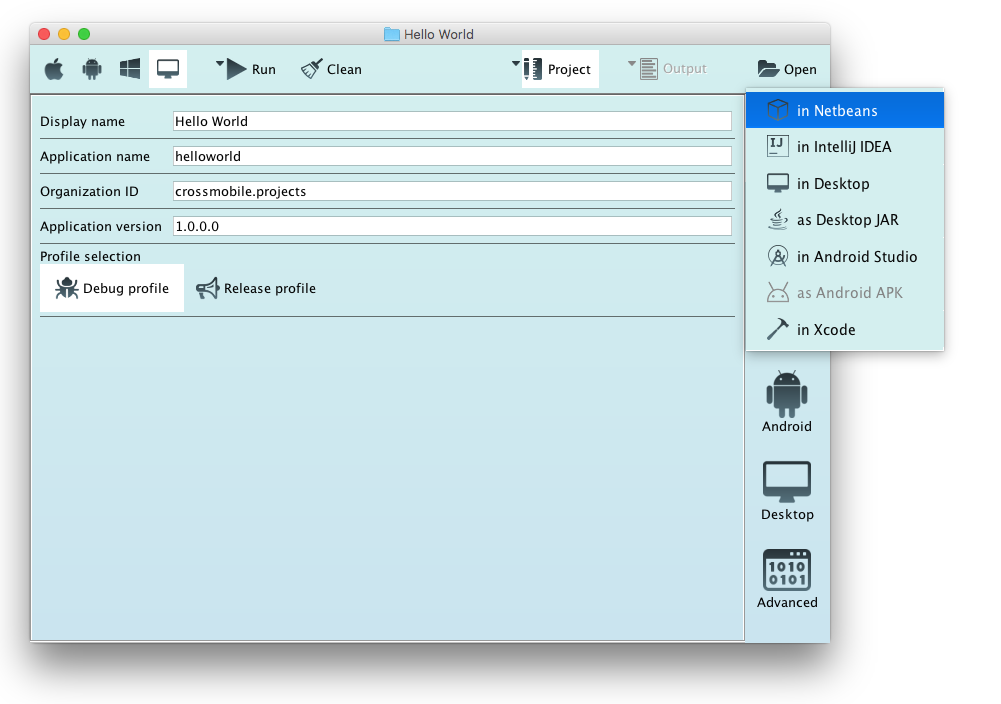
For the needs of our first example we are going to use Netbeans as IDE. Click the Open icon and then in NetBeans.
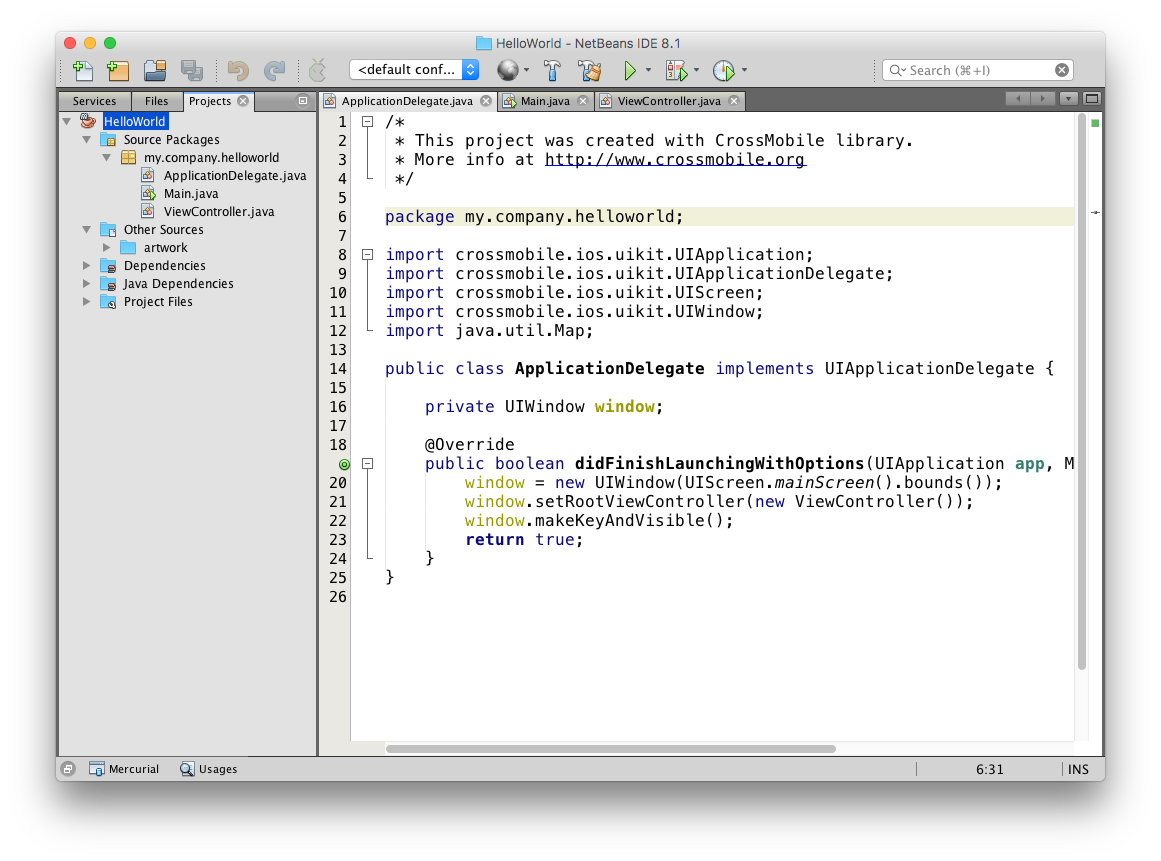
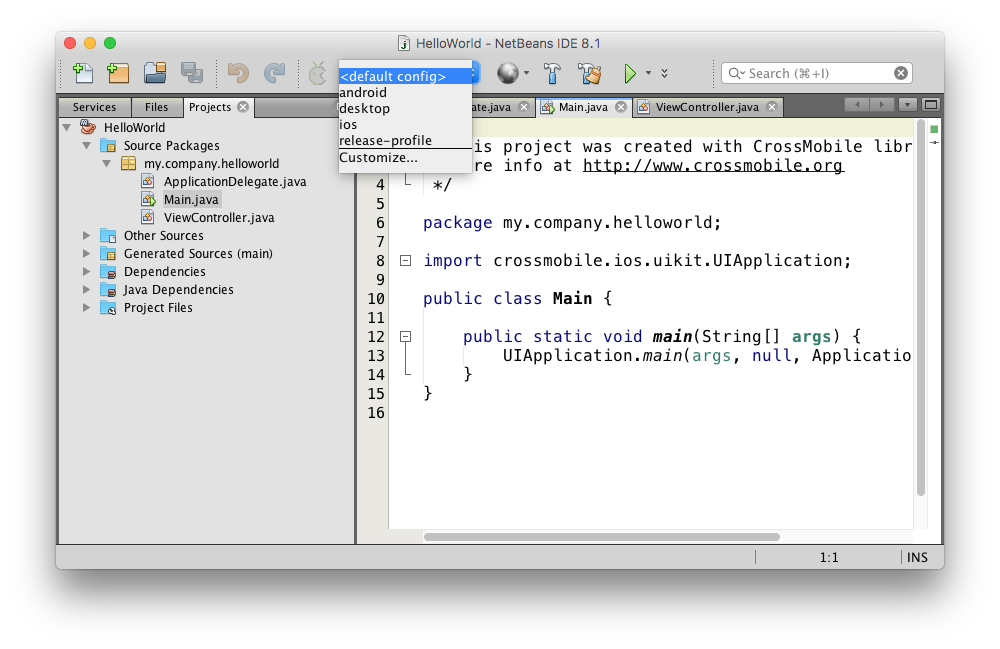
This opens your project with NetBeans IDE. When in any IDE, always remember to select the profile of the platform you wish to run your CrossMobile application before pressing the IDE’s play button. In NetBeans you can do this by clicking on the list where the “
Code Explanation
As you can see our first HelloWorld project has three source files: Main.java, ViewController.java and ApplicationDelegate.java. These are the basic source files of every CrossMobile project.
Choose your project HelloWorld from projects tab and open Main.java file under Java sources folder. This contains the below java code:
Main.java
package crossmobile.projects.helloworld;

import crossmobile.ios.uikit.UIApplication;

public class Main {

    public static void main(String[] args) {
        UIApplication.main(args, null, ApplicationDelegate.class);
    }
}
The next class of our project is ViewController.java. The source code is following:
ViewController.java
public class ViewController extends UIViewController {

    @Override
    public void loadView() {
        UIView mainView = new UIView(new CGRect(0, 0, 320, 400));
        mainView.setBackgroundColor(UIColor.colorWithWhiteAlpha(0.9f, 1));

        UILabel title = new UILabel(new CGRect(0, 390, 320, 40));
        title.setAutoresizingMask(UIViewAutoresizing.FlexibleWidth);
        title.setText("Hello World!");
        title.setTextAlignment(UITextAlignment.Center);

        UIImageView img = new UIImageView(new CGRect(80, 80, 159, 220));
        img.setAutoresizingMask(UIViewAutoresizing.FlexibleLeftMargin | UIViewAutoresizing.FlexibleRightMargin);
        img.setImage(UIImage.imageNamed("logo"));

        mainView.addSubview(title);
        mainView.addSubview(img);

        setView(mainView);
    }
}
So let’s see how our view controller works:
ViewController class extends UIViewController and has a single method named loadView() that implements what will be displayed on screen.
The ViewController has the following main responsibilities:
- Updates the contents of the views, usually in response to changes of the underlying data.
- Responds to user interactions with views.
- Resizes views and manages the layout of the overall interface.
Inside the loadView() method we create three objects:
- mainView object of type UIView. The UIView class defines a rectangular area on the screen along with the interfaces that manage the content of that area. At runtime, a view object handles the rendering of any content in its area and also handles any interactions with that content.
    @Override
    public void loadView() {
        UIView mainView = new UIView(new CGRect(0, 0, 320, 400));
        mainView.setBackgroundColor(UIColor.colorWithWhiteAlpha(0.9f, 1));
We apply to it the method setBackgroundColor(UIColor.whiteColor()); that sets the background color to white. If you want to change the background color just delete the whiteColor() parameter press (ctrl+space) in order to enable Netbean’s autocomplete option and choose the color you want.
- title object of type UILabel. This class implements a read-only text view. You can use this class to draw one or multiple lines of static text. CGRect defines the position and the size of the label. The first two integers specify the coordinates of the rectangle and the last two its width and height.
        UILabel title = new UILabel(new CGRect(0, 390, 320, 40));
        title.setAutoresizingMask(UIViewAutoresizing.FlexibleWidth);
        title.setText("Hello World!");
        title.setTextAlignment(UITextAlignment.Center);
We apply the method title.setText(“Hello World!”) that sets the label’s text to “Hello World!” and setTextAlignment(UITextAlignment.Center) sets text alignment to center.
- img object is of type UIImageView. The UIImageView provides a view-based container to display a single image or in case of animating a series of images.
        UIImageView img = new UIImageView(new CGRect(80, 80, 159, 220));
        img.setAutoresizingMask(UIViewAutoresizing.FlexibleLeftMargin | UIViewAutoresizing.FlexibleRightMargin);
        img.setImage(UIImage.imageNamed("logo"));
Here the CGRect in the constructor describes the image area as above and
the method setImage(UIImage.imageNamed(“logo.png”)) sets the image named logo.png from the specified resources folder (artwork[1]) to be displayed in this image view.
Finally we apply addSubview(title) and addSubview(img) methods to the main object mainView. This method adds a view to the end of the receiver’s list of subviews. In this case we add the label and the image to the view. Notice that if you create an item (view) and you forget to add it then it will not appear on the screen.
Lastly, with the setView method we set mainView as the root view for the view controller’s view hierarchy.
The last source file is the ApplicationDelegate.java. This class is responsible for assigning the ViewController of our application as the root view controller.
ApplicationDelegate.java
public class ApplicationDelegate implements UIApplicationDelegate {

    private UIWindow window;

    @Override
    public boolean didFinishLaunchingWithOptions(UIApplication app, Map<String, Object> launchOptions) {
        window = new UIWindow(UIScreen.mainScreen().bounds());
        window.setRootViewController(new ViewController());
        window.makeKeyAndVisible();
        return true;
    }
}
Inside the didFinishLaunchingWithOptions()we create an object window.
The UIWindow class defines an object known as a window that manages and coordinates the views that an app displays on a device screen. An app has only one window unless it displays content on an external device screen. In the constructor we also define the bounds of our app on the main screen of the device on which our app runs. (line 6)
Then we apply the setRootViewController() to the window object that we created. This method provides the content view of the window.
Assigning a view controller to this property installs the view controller’s view as the content view of the window. If the window has an existing view hierarchy then the older views are removed before the new ones are installed.
At this time the view we will use is implemented in the MainController.java file in the same package so we set it as root view controller.
The second method that we apply to the window object is makeKeyAndVisible() which is a convenient method to make as receiver the main window and displays it in front of other windows (at the same window level or lower).
So this was our first application’s code. More details about UIView and CGRect are available in the next tutorials.
Run HelloWorld app
Now let’s run our application!
You can run your application within NetBeans: chose desktop and press Run.
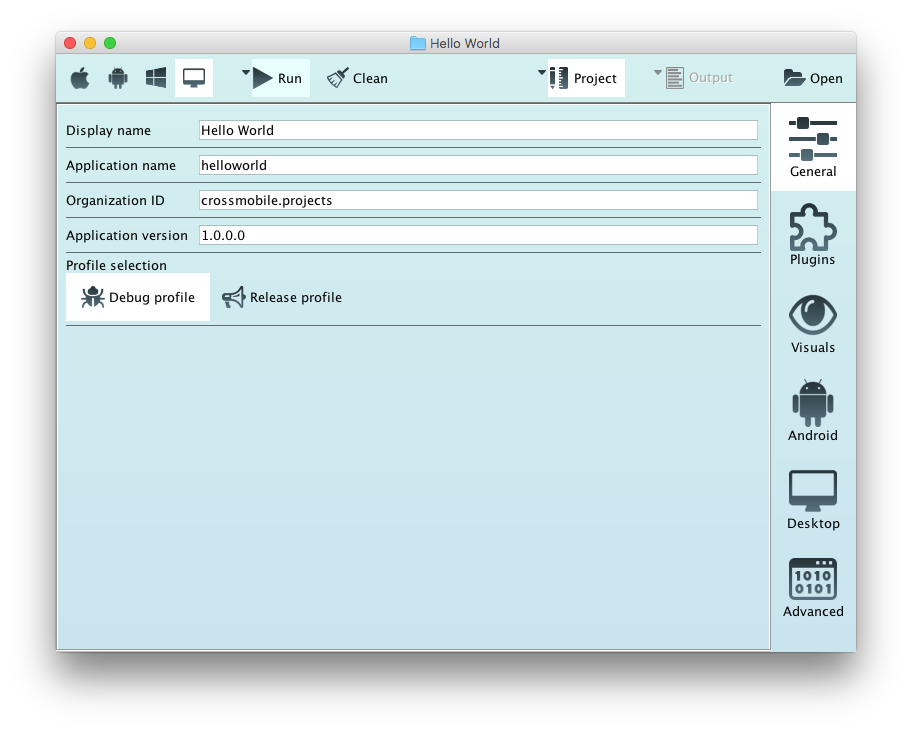
Or from CrossMobile interface where you click Desktop and Run.
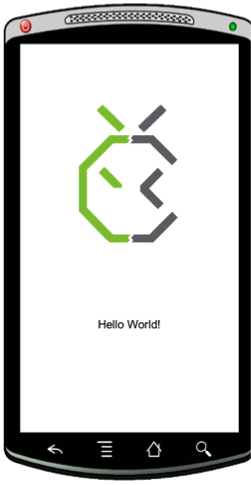
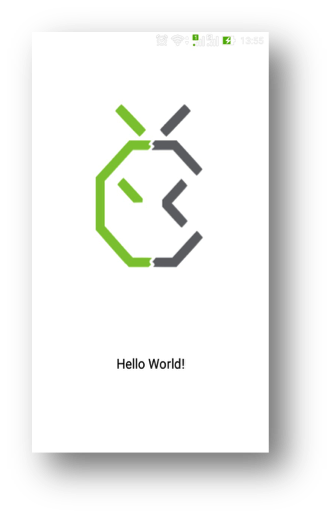
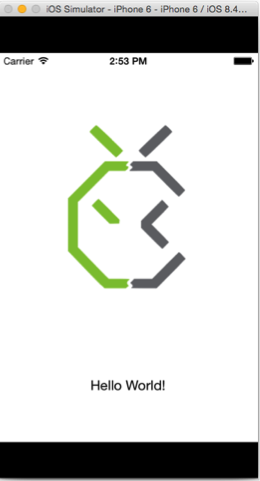
So here are the running snapshots of our HelloWorld application on Desktop, IOS and Android.
Using another IDE
Android Studio
If you want to use Android Studio as the IDE of your project then click Open and in Android Studio.
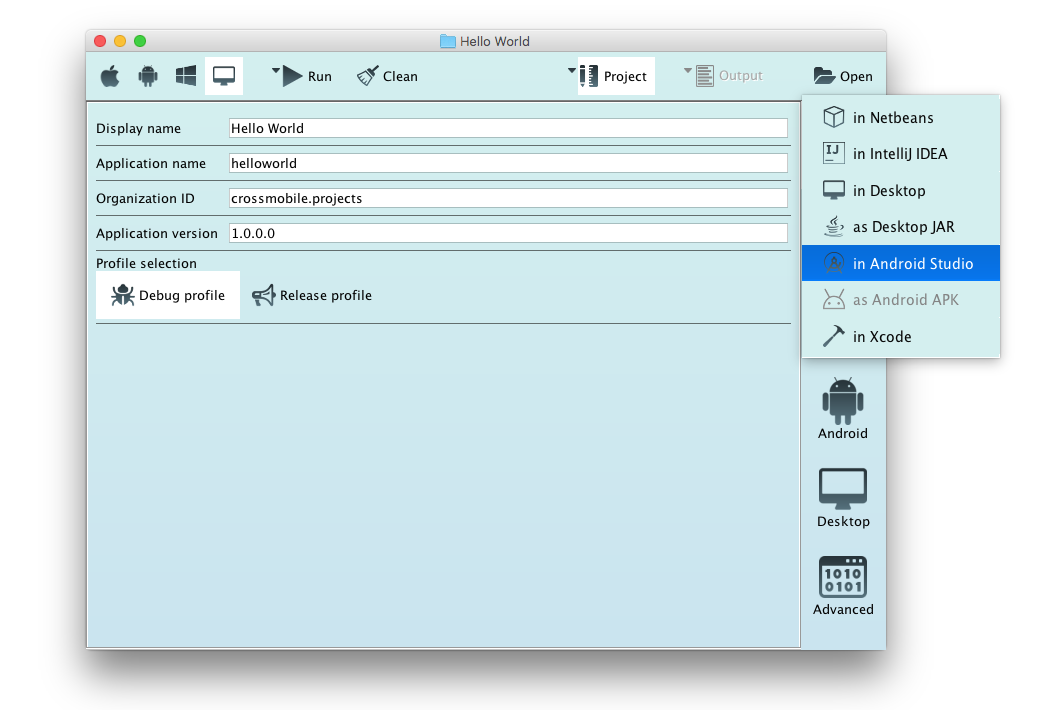
Your project opens with Android Studio:


Xcode
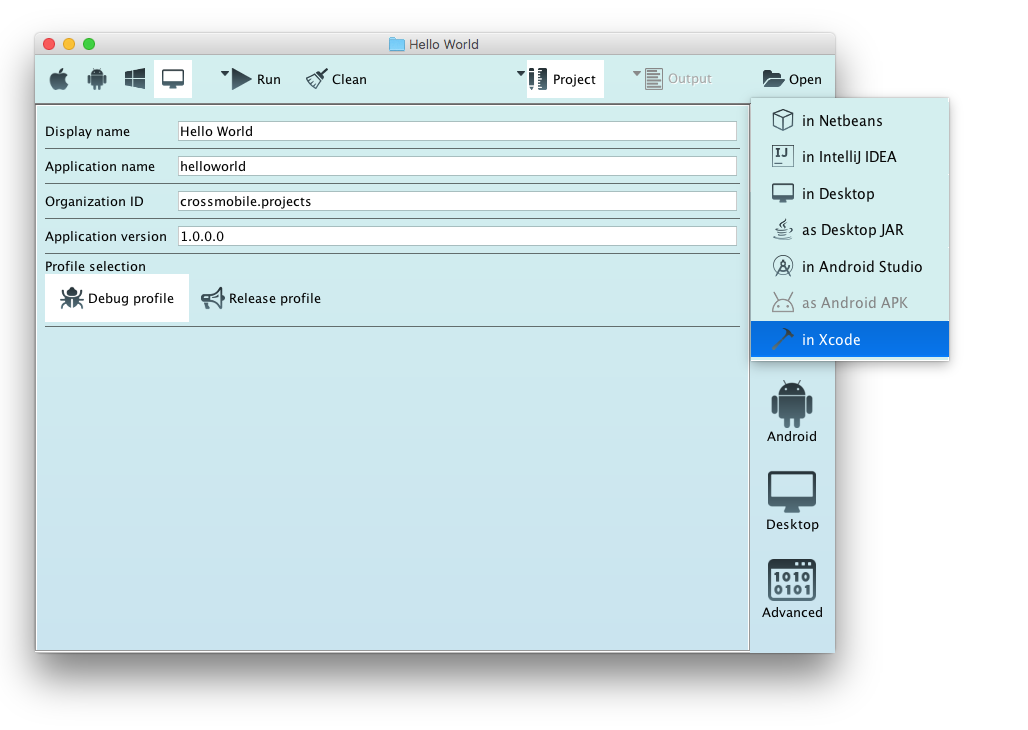
In the same way, you can work using Xcode. Click again the Open button and in Xcode:
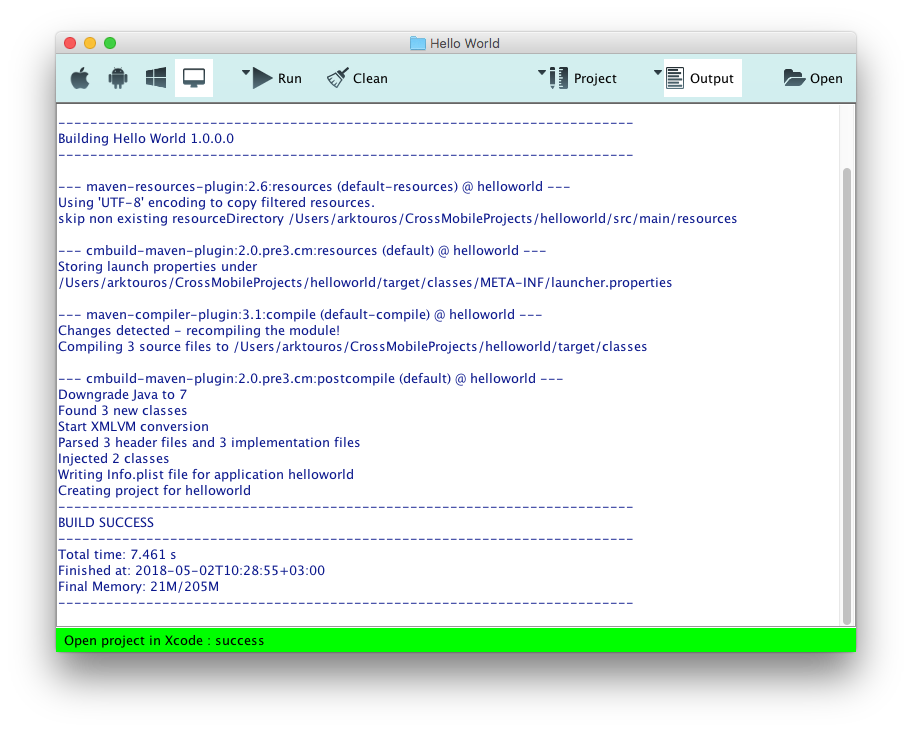
CrossMobile opens Xcode for you:
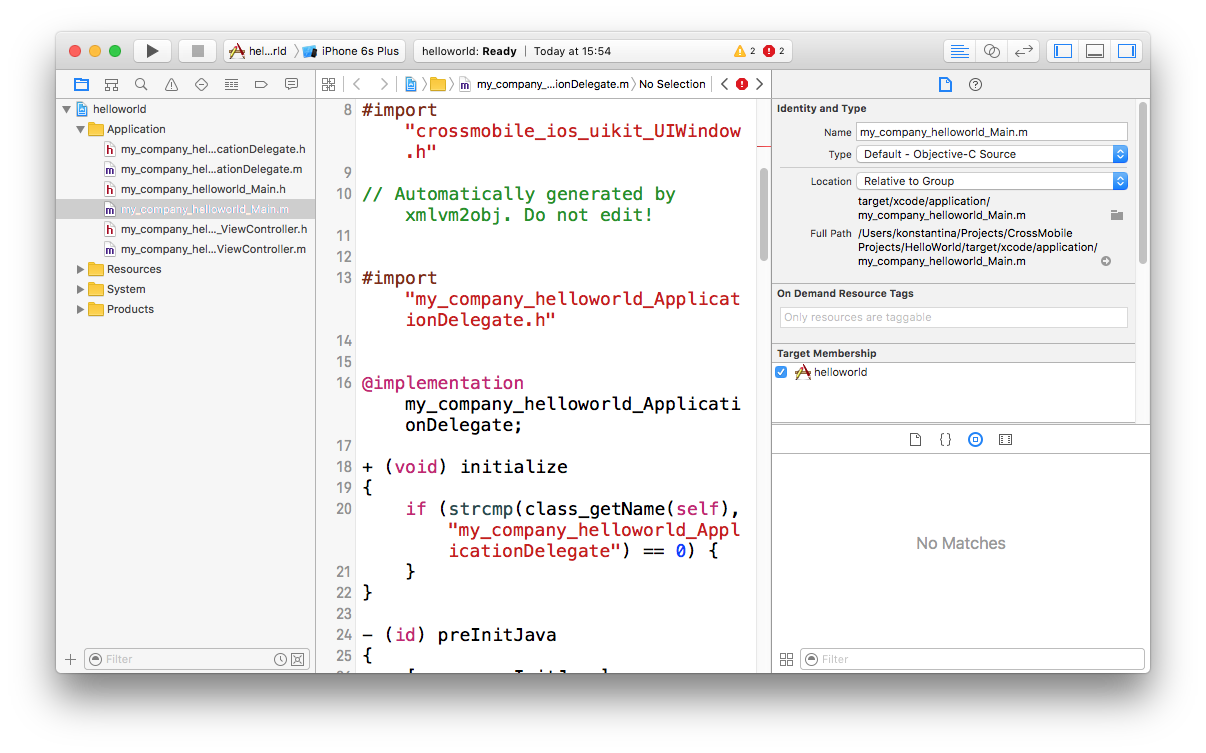
And you are ready to navigate and edit your project with Xcode:
If you want to use Eclipse or IntelliJ IDEA follow our guides here (Supported IDEs)
[1] artwork: resources folder contains all the multimedia files that your application uses for example image files etc.