CrossMobile Interface Tutorial
In this section we will present the available options of CrossMobile’s interface. You may want to take a look before you continue to the second tutorial, where you will start making changes to your first “HelloWorld” application. Feel free to skip this section and refer to it as guide in the future.
First of all, as you can see there are three options with the logos of Apple, Android and one for the Desktop (environment/device).
Also there is a dropdown list with the following options (actions):
-
Deploy: If you click Deploy then CrossMobile runs your application. You can run your app on your workstation, using the theme that you have already selected or plug-in an Android device to run application on you own device.
-
Build: In case you only need to Build your project and click Build on the dropdown list.
-
Code: Start editing your code using Xcode, Android Studio or Netbeans, all you have to do is select the preferred environment and click Code on the dropdown list.
Using a combination of an environment and an action you are able to deploy, build or code your application to the corresponding environment or device.
First click on the specific environment/device that you prefer and then select the action.
Additionally there are the following buttons:
-
Save: save your project.
-
Clean: use this choice to clean your project before you continue recompiling it to a different format.
At the right side of the window you have a sidebar with five tabs (General, Plugins, Visuals, Android, Desktop, Advanced) that provide further configuration. They are all explicitly explained below.
General
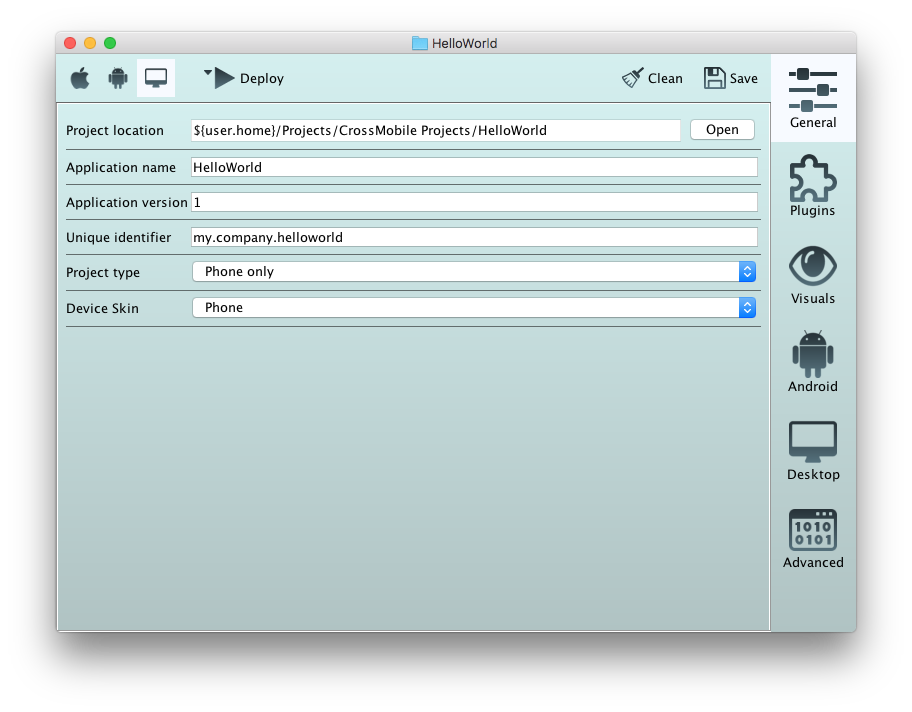
This tab gives you the following configuration options:
- Project location: navigate to your project folder.
- Application name: your project’s name.
- Application version: specify the version of you app.
- Unique identifier: unique application identifier.[1]
- Project type:
- Phone only
- Pad only
- Hybrid Phone and Pad
- Device skin
- Default skin
- Phone/Phone short
- Pad/Pad wide
- System small/large/overlayed[2]
- Fixed small/medium/large
Plugins
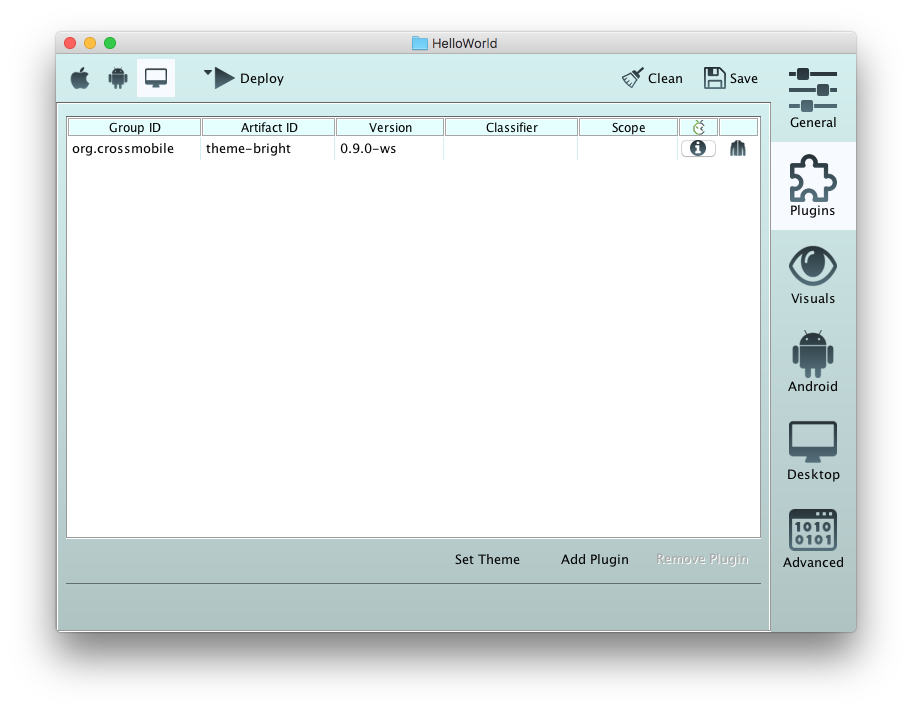
Using the Plugins tab you are able to change the theme of your application or add useful plugins.
Set Theme
Click the Set Theme option in order to change the Theme you have selected at the beginning.
The following windows pops up.
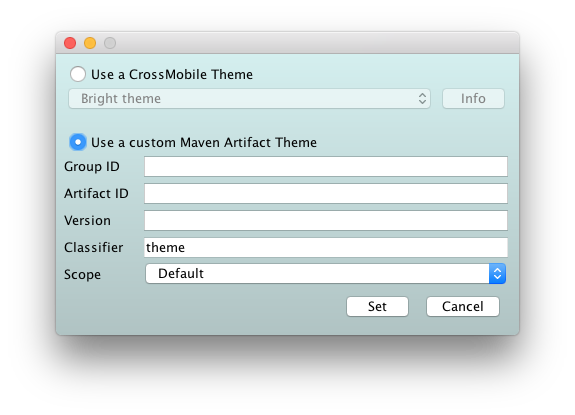
You are able to select a CrossMobile Theme or use a custom one by specifying the corresponding options.
Add Plugin
Click this option and the following window pops up:
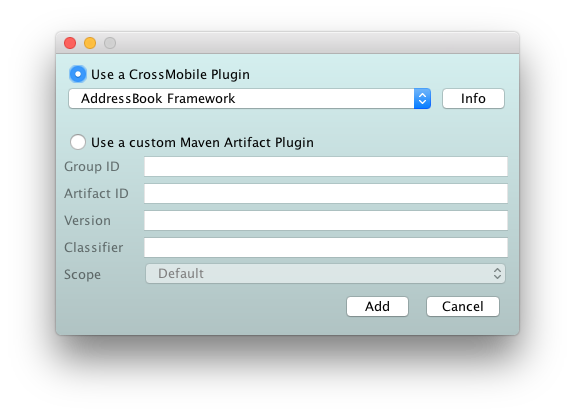
Plugins:
- AddressBook Framework
- GameKit Framework
- in App Payment Framework
- Quick Look Framework
- Social Framework
- Social Framework Pro
- Core Location Framework
- CoreImage Framework
- SQLite Plugin
- Reachability Plugin
- Zip Plugin
- Keychain Plugin
More information about the plugins you can find in the Plugin Library (link)
Again you are able to add any of our available plugins or any of your own custom plugins by specifying the maven parameters.
Visuals
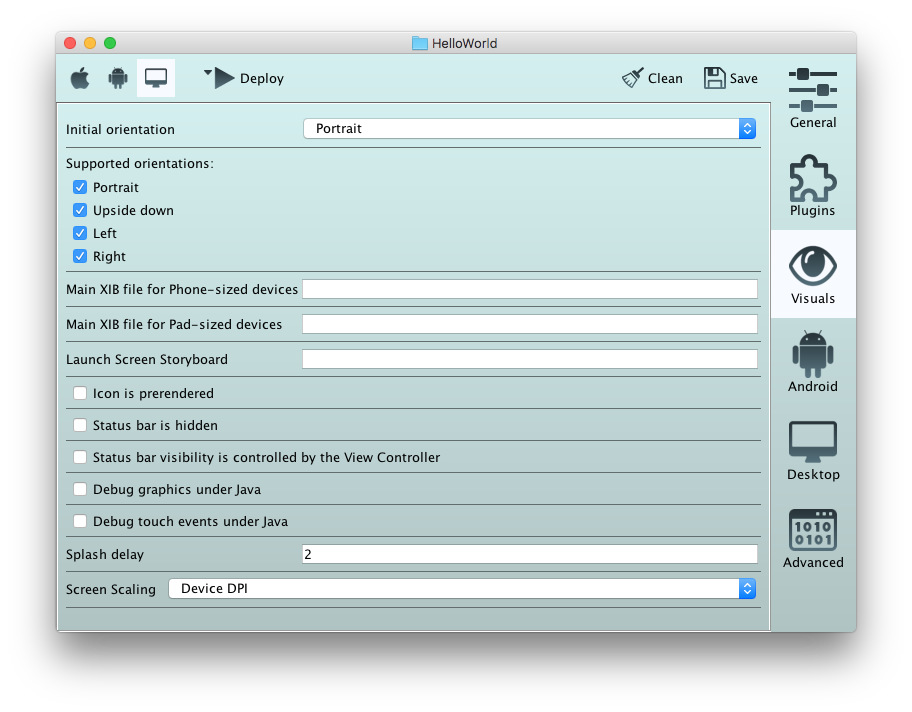
Visuals tab gives you the following configuration options:
-
Initial orientation: this option allows you to force your application to start with one of these choices as initial orientation of screen:
- Portrait
- Upside down
- Left
- Right
-
Supported orientation: you may also want to restrict the supported orientation to any of the above choices. The current orientation of your screen may change as the user interacts with your application.
-
Main XIB file for Phone-sized /Pad-sized devices: Add XIB file’s path for phone or Pad sized devices (IOS only). [3]
-
Launch Screen Storyboard[4]: insert the path of the storyboard you created on Xcode.
-
Icon is prerendered: Choose whether icon will be pre-rendered or not.
-
Status bar is hidden: In the same way choose whether status bar of app is hidden
-
Status bar visibility is controlled by the View Controller: Or if its visibility is controlled by the view controller
-
Debug graphics under Java: select this option and see the division of the visible part of application.
-
Debug touch events under Java: check this option to see which parts of your application screen are affected by user touch.
The last two options help you test your application’s response to your user interaction.
-
Splash delay: define in seconds the delay of the splash screen. [5]
-
Screen Scaling:
- Native
- DPI
- Fixed
We suggest that you try by yourself these options and preview the corresponding result of each selection.
Android
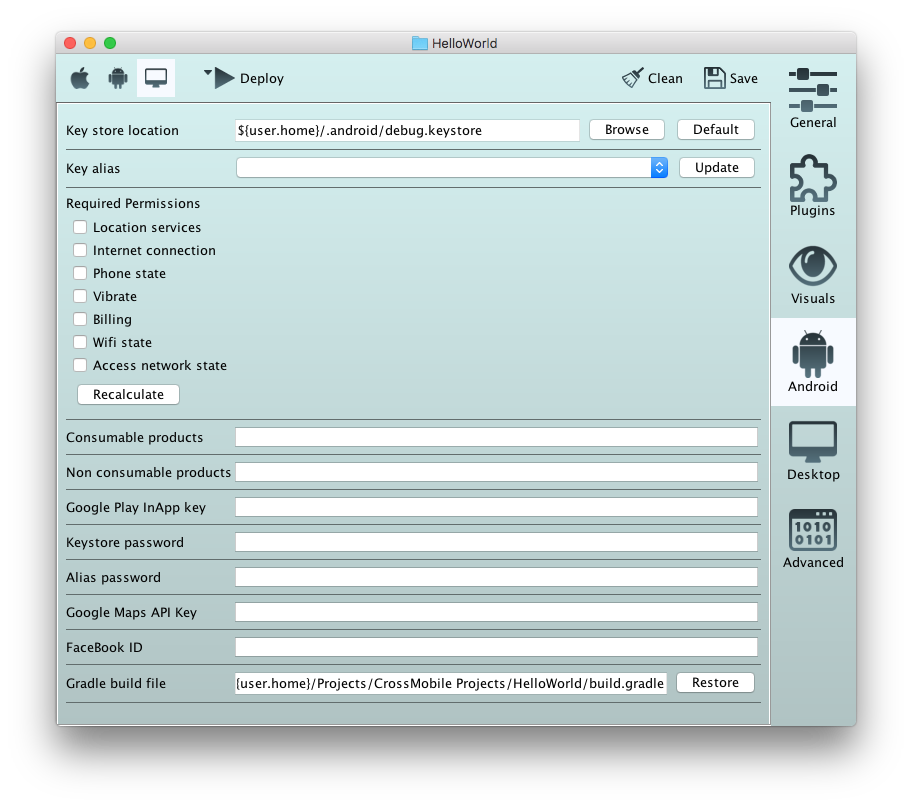
Selecting the Android tab you can see above, you have the following configuration options:
- Keystore location: you can browse to find alternative location of keystore or choose the default one. [6]
- Key alias: Choose alias
- Required Permissions: Define the required permissions needed by your app or simply recalculate them. More specifically each application before installed to your mobile device requires authorization in order to access various services. The required permissions of an application are registered to the manifest.xml file of your application project when you create it. This option here automates the registration. Choosing recalculate, CrossMobile’s finds the requirements for you. If needed you may change the manifest.xml file and define by yourself these permissions.
- Location services
- Internet connection
- Phone state
- Vibrate
- Billing
- Wi-Fi state
- Access network state
- Consumable/ Non Consumable products: Add consumable or non- consumable products to your app. When installing an application to your mobile device even if it is free it might require purchasing extra content in the future. This content ie “items” is used once and expire (consumable) or you buy and reuse it as long as you use the application. This option allows you to incorporate this function in the applications that you create.
- Google Play InApp key: Add your Google play app key[7]
- Keystore password/ Alias password: Change keystore or Alias password
- Google Maps API key: Add your app’s Google Maps API key
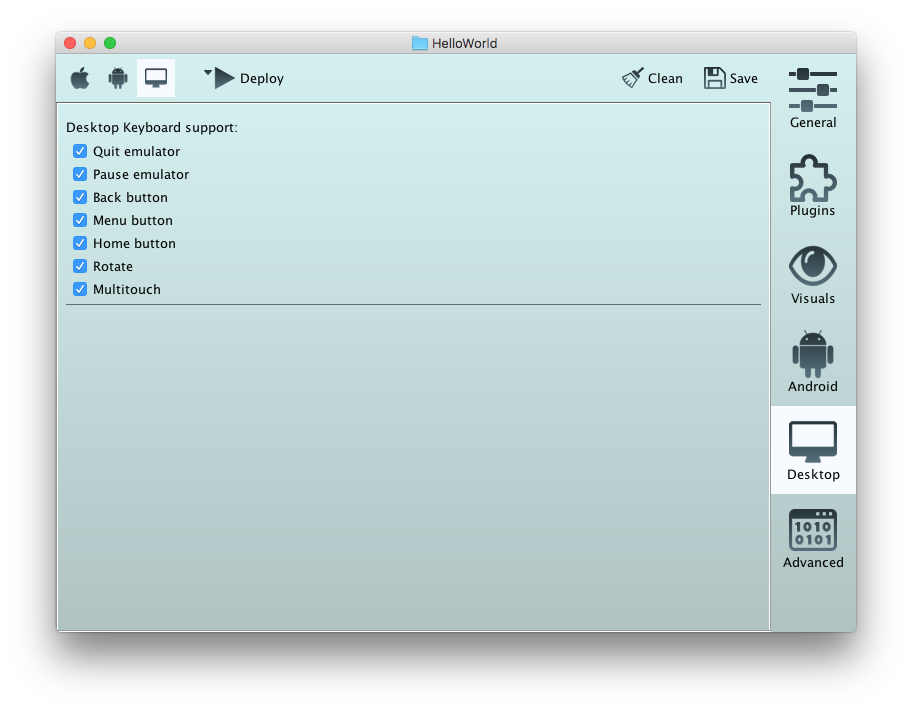
Desktop
-
Desktop Keyboard support: Tweak the desktop keyboard support
-
Quit emulator
-
Pause emulator
-
Back button
-
Menu button
-
Home button
-
Rotate
-
Multitouch
Advanced
-
Injected Info.plist: Inject further code into info.plist (XML used in Apple’s development environment and operating systems that contains essential configuration information for a bundled executable)
-
About this application: In this field you can add and edit your application’s details.
-
File sharing enabled: check this option if your app provides this function
(you can copy files between your computer and apps on your iOS device)
- Exit on close: This option that lets you tweak the application’s behavior on close or when it is inactive
This was CrossMobile’s interface tutorial. As mentioned before you may use this tutorial as reference guide of the interface in the future. We even prompt you to test the above options alongside the tutorials that follow in order to make the most of CrossMobile capacities.
[1] It is the application package name and works as the identifier of the application. This name is unique among all the applications currently installed on the phone. Additionally there can’t be two applications with the same Application package on the Market that means this number is unique on the Android Market. On the other hand it is possible for two developers to create two different applications with the same Application package. However they can’t both be hosted on the Market — because the second would be rejected due to the rule: “unique App package name across Market”
[2] Use this option to preview your Desktop application’s appearance. (jar files)
[3] XIB is the file format for Interface Builder, which is a development tool for the Mac OS X & iOS platforms. It is part of Xcode (formerly Project Builder), the Apple Developer Connection developer’s toolset.
[4] Storyboard: a graphic organizer in the form of illustrations or images displayed in sequence for the purpose of pre-visualizing a motion picture, animation, motion graphic or interactive media sequence
[5] Splash screen: the window that appears while the application is loading. Usually it is a kind of a black screen with the title and the icon of the application on top. However you can change that by using a style/theme.
[6] keystore: in order to submit your tested and debugged Android app to an app store such as Google Play, you need to create a keystore file that is responsible for maintaining cryptographic keys and their owners
[7] In-app Billing: a service allowing Android developers to sell digital goods from inside the application. http://developer.android.com/google/play/billing/index.html