In this tutorial we will examine how to create simple a storyboard project with CrossMobile. (Mac only)
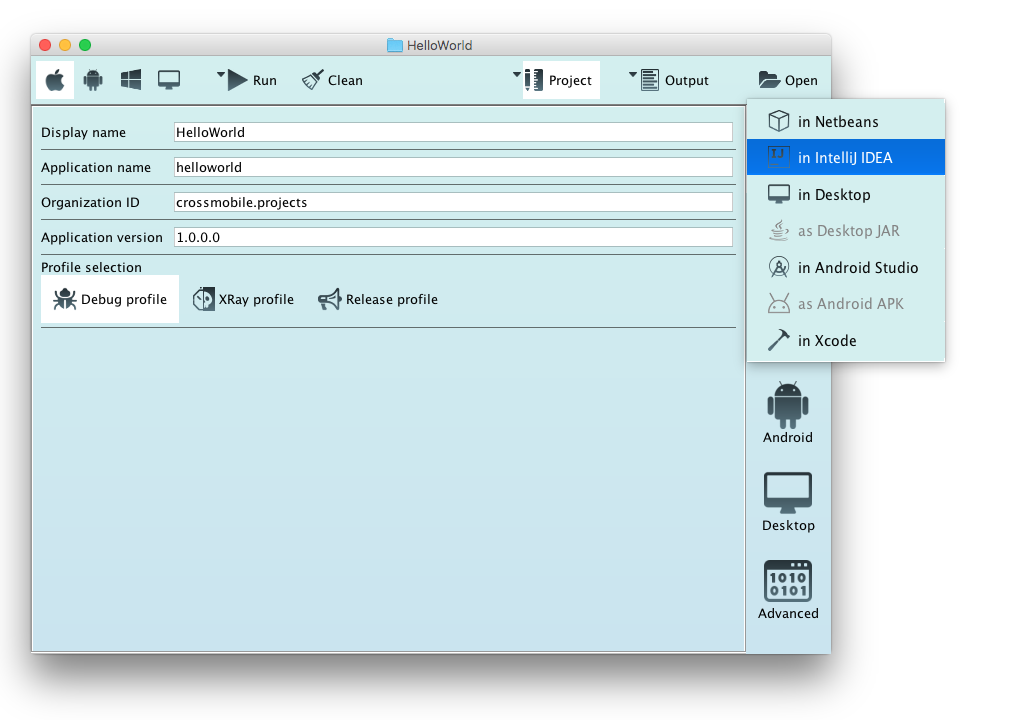
First Open the CrossMobile manager and click New Project.

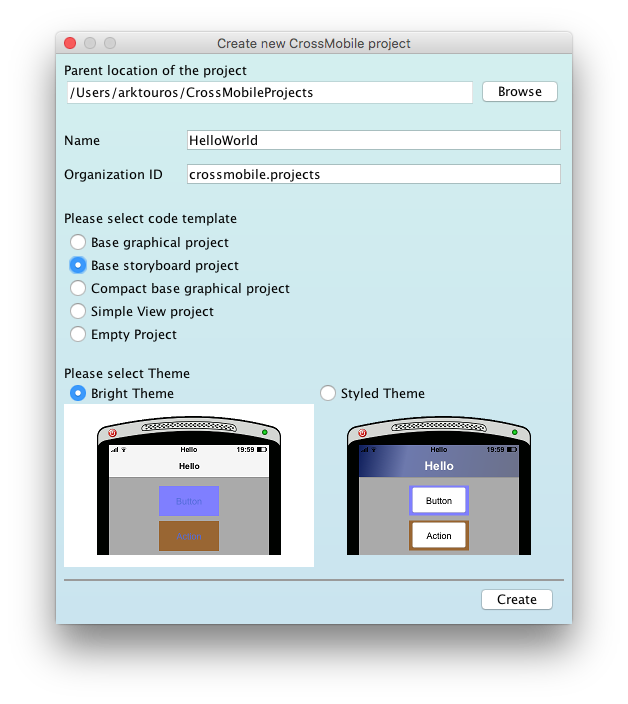
In the new project window select “Base storyboard project” and click Create.
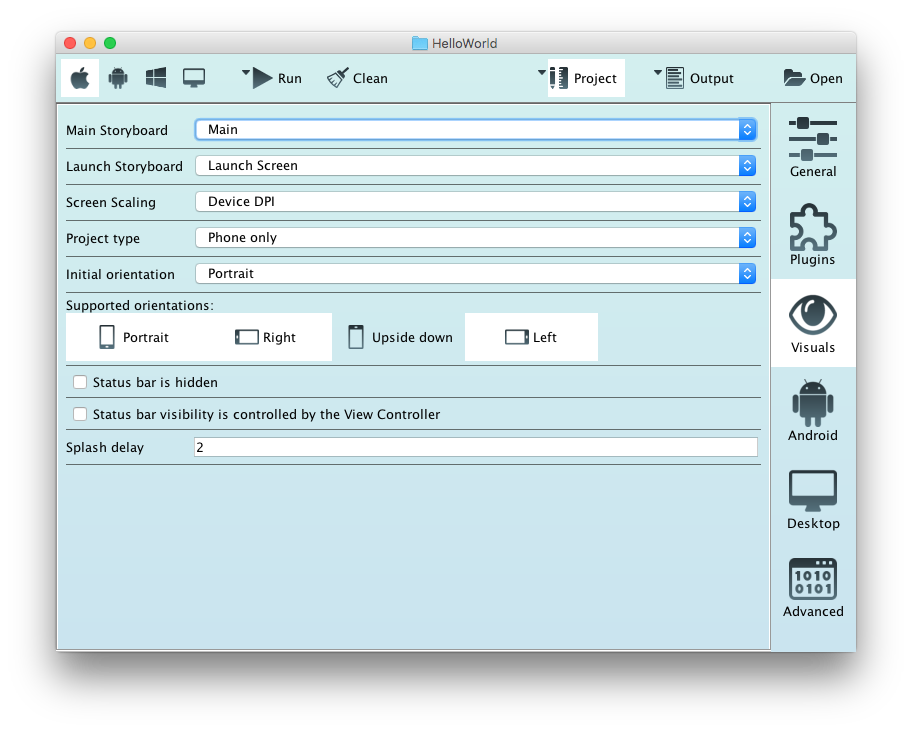
When the Project window opens, select “Visuals” from the side bar and make sure that “Main” is set as the Main Storyboard.
And run your project for ios.

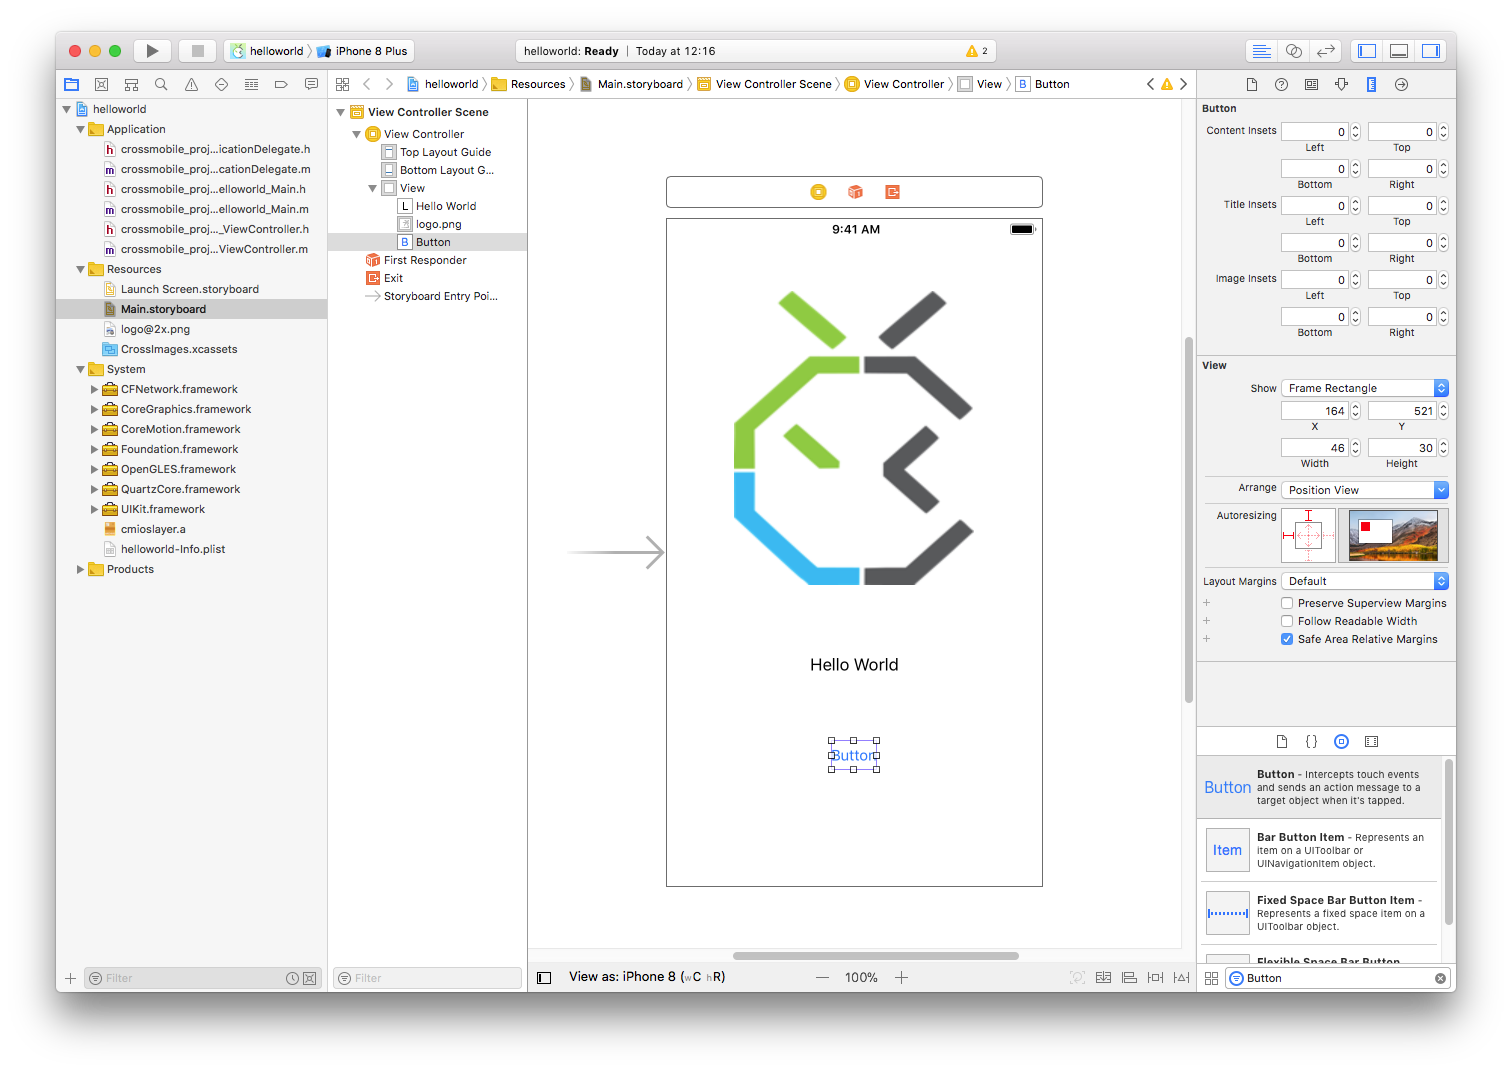
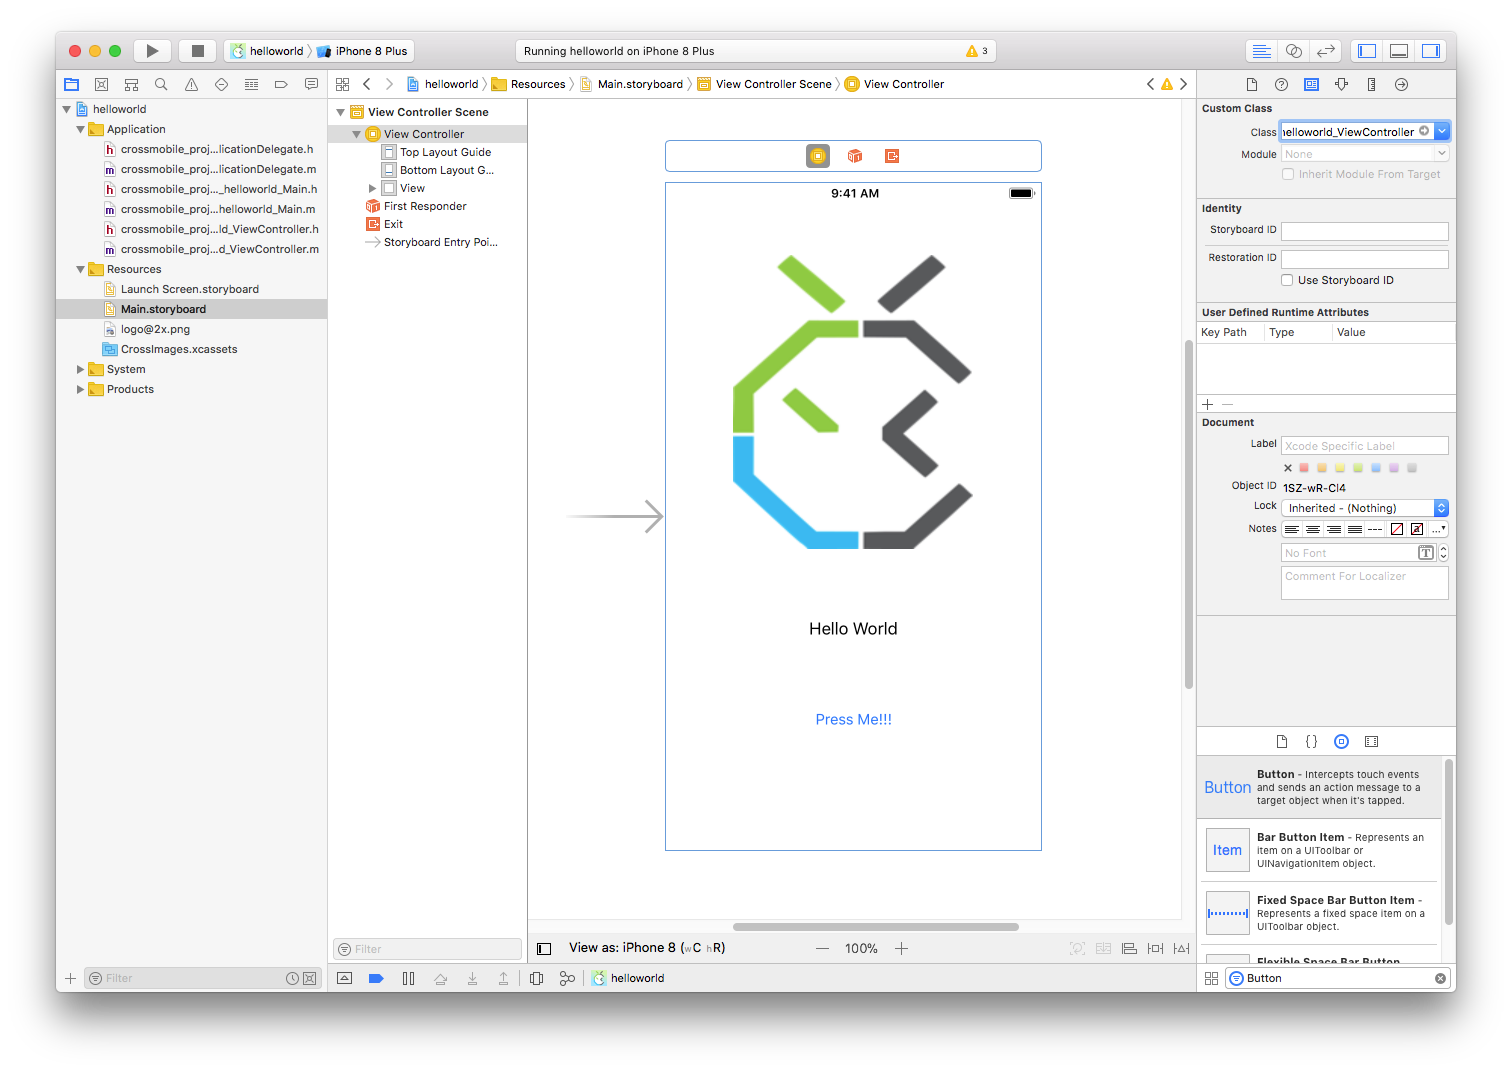
When the Project opens in xcode, select the Main.storyboard file under Resources to open it in the Editor. Form here youo can edit the storyboard as you would for an iOS app.
First lets add a button to the View.

Go to the editors lower right and type “Button” in the search box, click the Button Item and drag it into the view. Double click on the button to change its text to “Press Me!!!”
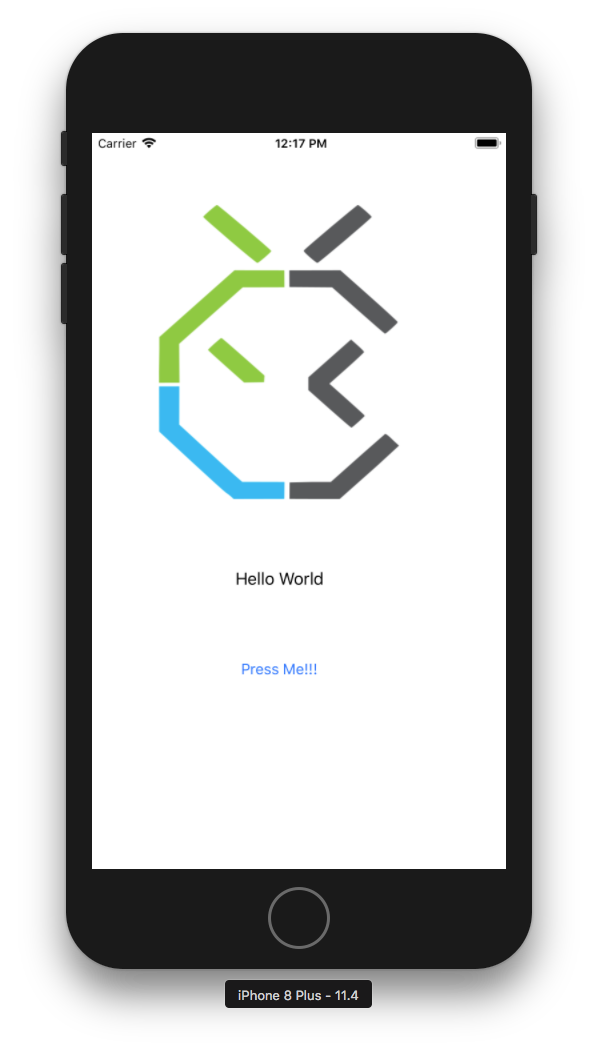
Click run to see how it look s like in the emulator.
We now have a View with an ImageView containing the CrossMobile logo.
A Label with the text set to “Hello World
and a Button that does nothing.
Time to add some action !!!
Go to CrossMobile Manager and open the project in your favorite IDE.
Open ViewController.java. You will Notice that the View Controller is empty, that’s natural since its content is managed from the Storyboard.
public class ViewController extends UIViewController {

}
First we will add an outlet for the Label. To do that we declare a public field of the type UILabel and add the @IBOutlet annotation to it.
It needs to be public so it can be referenced from the Storyboard.
And the @IBOutlet annotation lets the CrossMobile Framework know that this field will be used as an Outlet
public class ViewController extends UIViewController {

    @IBOutlet public UILabel label;

}
Next we will add an action for the button to do that we create a public method that returns void, and has a parameter of the type UIControl. And we add the @IBAction annotation to it.
The name of the method can be anything.
In the method body we change the label’s text to “I’m im"Pressed" !!!!”
public class ViewController extends UIViewController {

    @IBOutlet public UILabel label;

    @IBAction public void action(UIControl sender) {
        label.setText("I'm im\"Pressed\" !!!!");
    }
}
After you save the changes, run the project from CrossMobile Manager for ios, or build the project with “ios” and “run” as active profiles, so it will open in xcode.
Now we need to bind the View Controller in the storyboard with the one in our code.
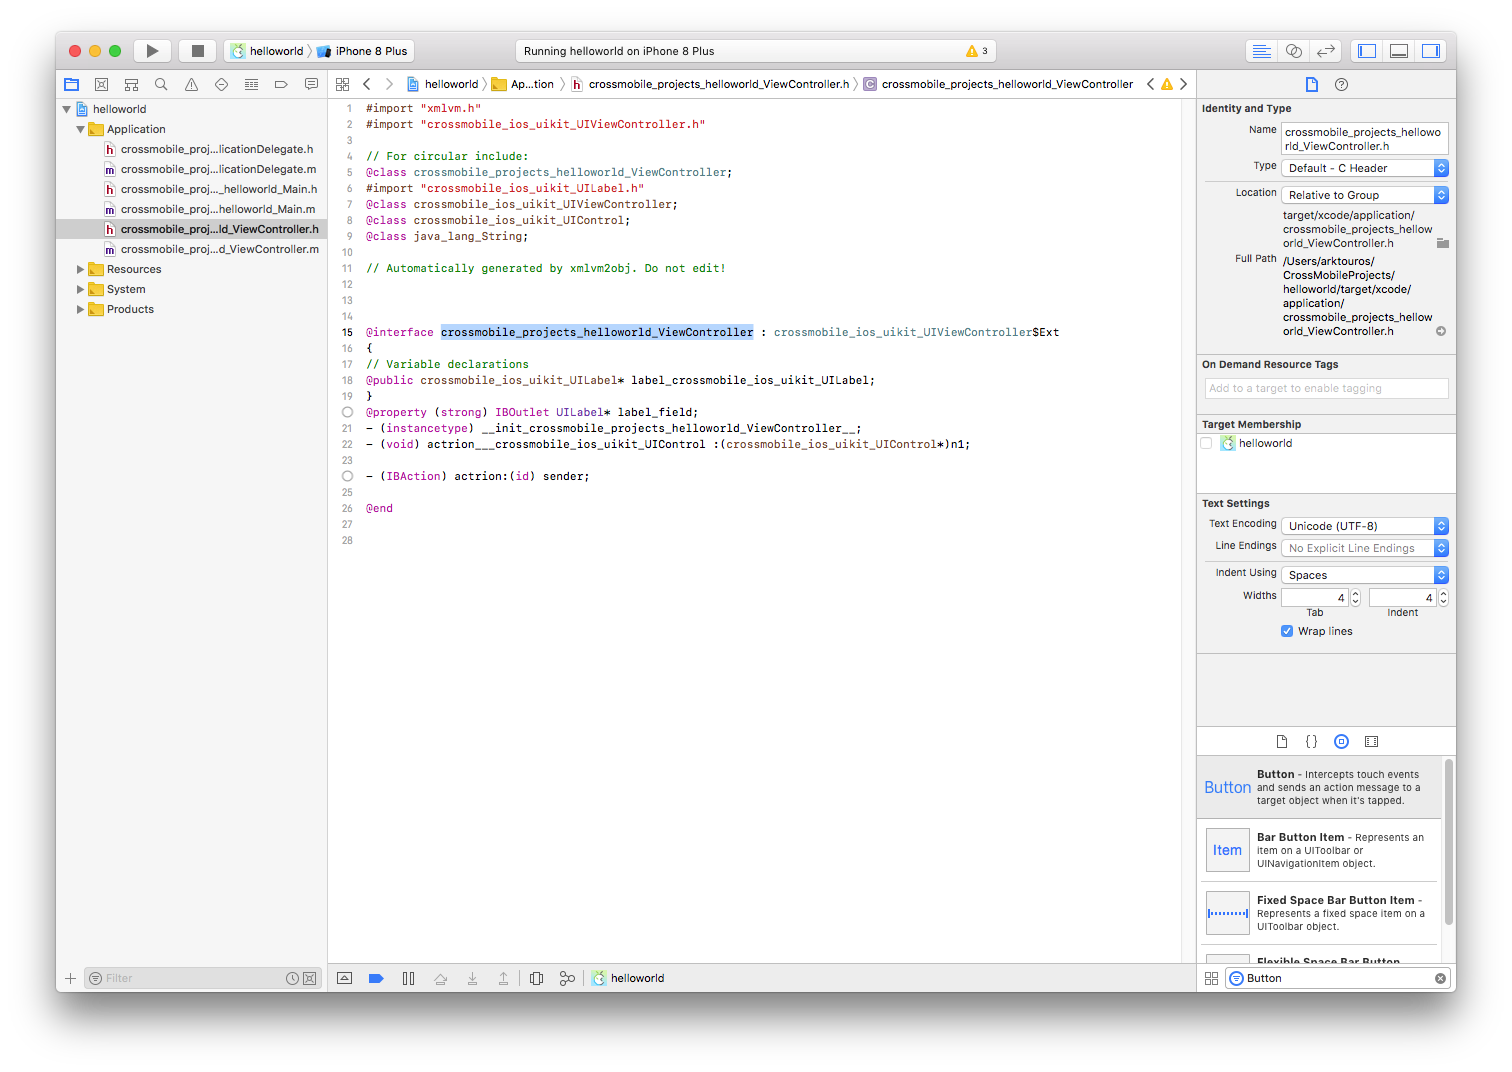
To do that go to ObjC generated class for ViewController.java and copy the Class name.
(Since ObjC does not have packages, to avoid inconsistences, the classes are named by their full java name in ObjC with underscores ‘_’ where the dots ‘.’ whould be, so “package.name.ClassName” becomes “package_name_ClassName” in Objc, in this case : crossmobile_projects_helloworld_ViewController)
And paste it to the View Controller’s Class Field it the Storyboard. That will tell the storyboard that this particular View Controller is of type “ViewController”
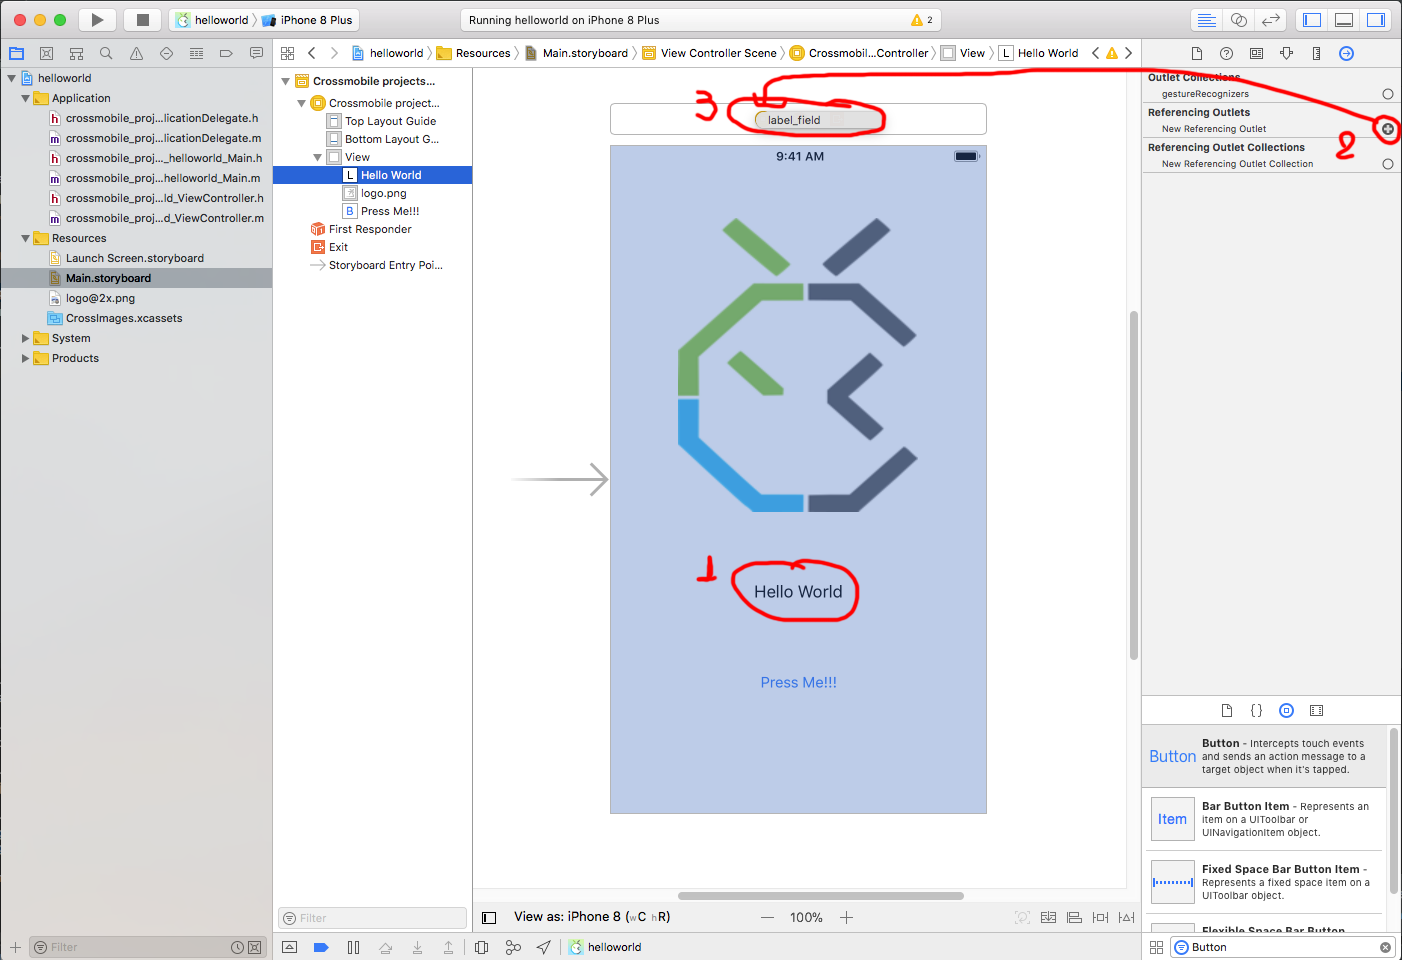
To connect the Label from the storyboard to the label IBOutlet we created in the code, select the Label in the interface builder. And from the Connections inpspector drag the new Referencing Outlet to the View Controller (Yellow Circle), and select “label_field” (the name is made up from the fields name, in this case label, plus _field)
That will bind the Label in the Storyboard to the label in the code.
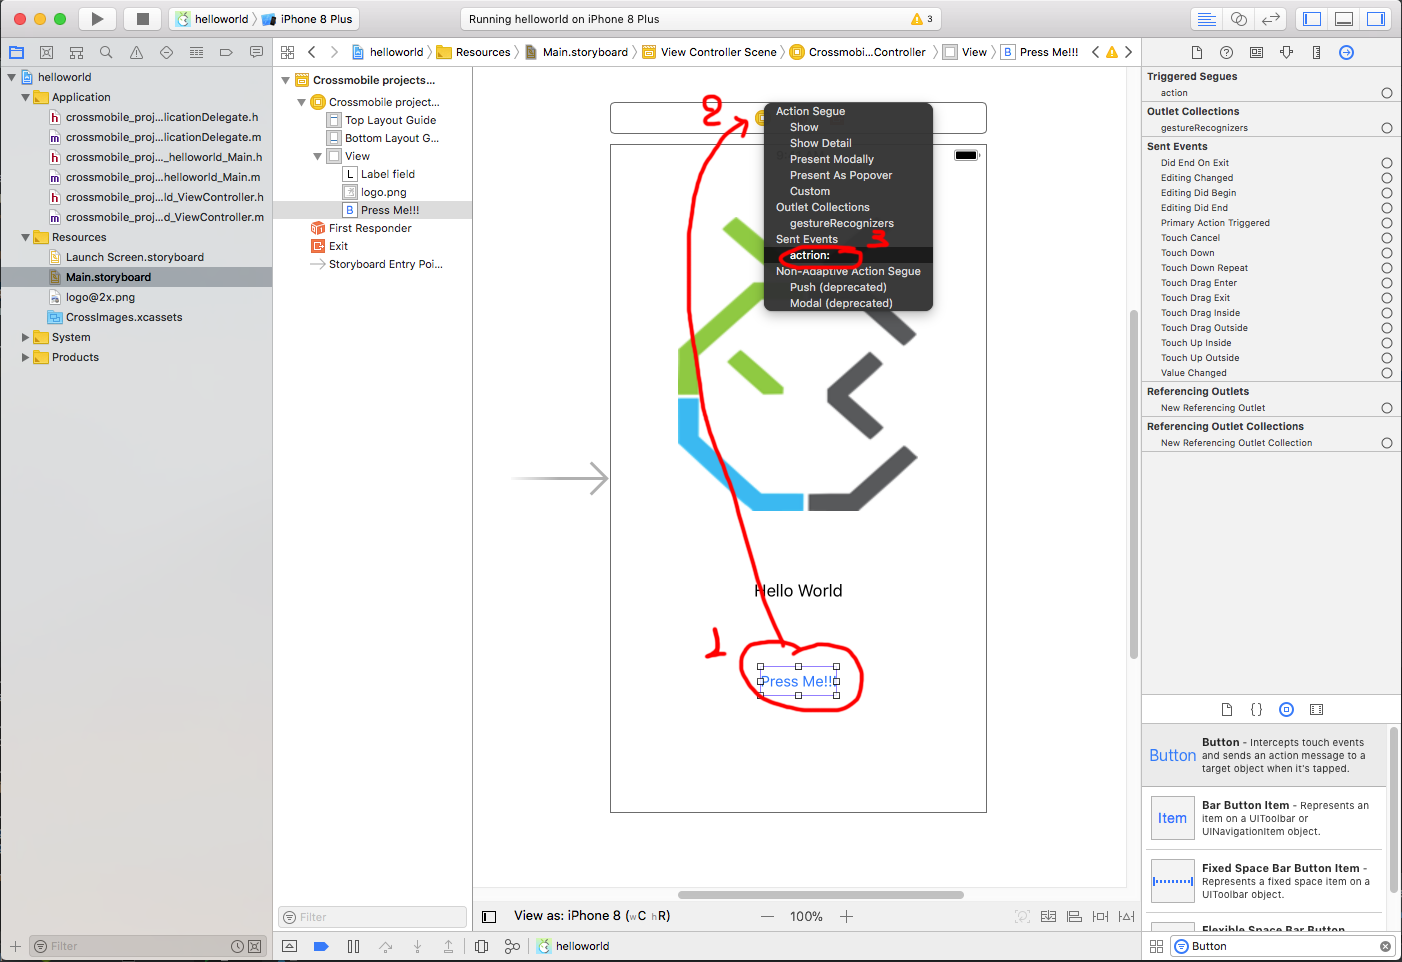
And for the Button, select the Button and Ctrl-Click and drag to the View Controller and Select “action:” under Send Events
Finaly Run the aplication.


As with everything in CrossMobile the Storyboard application will run on all platfors the same.
Run for Desktop and Android to check it out !!!.